Tuesday, July 16, 2013

Mystery of History Lessons 4-6


This week we continued on with Mystery of History with lessons 4-6
For Lesson 4: Noah & the Flood

Lesson 5: The Ice Age

He thought it was hilarious to have the ice on his belly!

 Lesson 6: Dinosaurs

We made sugar cookies and made insect fossils with them.  With the leftover dough, I cut some dinosaur bones out and baked them.  


Another excellent week with history!!

Blessings!!

Hearts for Home Blog Hop
TGIF Linky Party hosted by 123Homeschool4Me

Saturday, July 13, 2013

Mystery of History Lessons 1-3

So far we are really enjoying Mystery of History!  These are just a few of the things we did for our first week.

Lesson 1: Creation

The idea for this came from here:
http://grhomeschooling.blogspot.com/2009/06/days-of-creation-craft.html

Lesson 2: Adam and Eve

His masterpiece!!  He didn't know what to name it, but he said it was a fish/whale/frog all put together.


Lesson 3: Jubal and Tubal-Cain


To represent Tubal-Cain, I helped him to put holes in the canning lids and cut the wire.


I helped him to put it together and make a set of castanets to represent Jubal.


All in all a pretty good 1st week with history!!

Blessings!!!


Hearts for Home Blog Hop
TGIF Linky Party hosted by 123Homeschool4Me

Friday, July 12, 2013

Curriculum 2013-2014

Well we just finished week 2 of school, and I am absolutely loving all of my choices so far!!  None of my links are affiliate links.  I receive ABSOLUTELY nothing if you click through on them. 

This is from Covenant Home.  We are using it for our morning devotion.  There are 125 lessons that span from Genesis 1 to 1 Samuel 31.  
  
Next up is Positive Actions for Christ.  We used this for kindergarten and really enjoyed it, so I thought we would continue on with it for a couple more years.


We are almost half way through AAR 1 & AAS 1.  When we complete them, we will move onto AAR2 & AAS2. 


I am using both Handwriting Without Tears and A Reason for Handwriting.  


For English and Language Arts:

First Language Lessons for the Well-Trained Mind, Level 1


Language lessons for Little Ones #3

Language Smarts B


Horizons 1st grade Health


Daily Geography Practice, Grade 1 by Evan-Moor 

Expedition Earth by Confessions of a Homeschooler


Horizons Math 1
Math U See Alpha

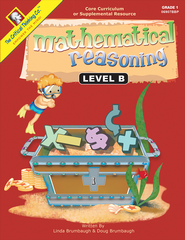
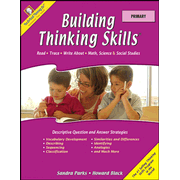
Mathematical Reasoning, Level B, Grade 1   - Building Critical Thinking Skills: Verbal Primary   -

Mathematical Reasoning Grade 1
Building Thinking Skills Primary

Art:
Appreciating Art
Home Art Studio Grade 1
Deep Space Sparkle

World's Greatest Artists 1

Art History 
Storybook Artist Study
World's Greatest Artist Volume 1


Mystery of History Volume 1 Ancient Times
Map Trek to use alongside of MOH

Product DetailsProduct Details

We are going to be doing A Year of Learning with The Berenstain Bears by the Enchanted Homeschooling Mom.  Membership to her sight is $15 for a lifetime and is well worth it!
We will also be continuing on with the rest of FIAR volume 1 and starting Volume 2.

God’s Design for Life Complete Set


We are going to be doing Answers in Genesis for science this year.  


Music
After completing this I will start teaching  keyboard


Blessings!!
For the Kids Fridays at SunScholars.com
TGIF Linky Party hosted by 123Homeschool4Me

Hearts for Home Blog Hop

Thursday, July 11, 2013

FIAR: A Pair of Red Clogs

A Pair of Red Clogs by Masako Matsuno


Conner really enjoyed this story.  The first thing I did was to soak a piece of wood in water and let it dry by our wood burner.  We discussed that if done enough, the wood will start to rot. 


Next we did a Koi craft.  You can find it here:


The next thing I did was to make Conner a pair of clogs.  They didn't take that long, but he has really enjoyed them!!

Materials:   a one inch piece of plywood cut into the size of the child's feet
                 4 pieces of the 1 inch plywood cut into1 inch strips and in the width of the shoe base
                 8 1-inch screws
                 nylon rope
                 scissors/knife
                 drill
                 lighter 


First, you need to drill holes in the small pieces of wood so that your screws will be counter-sunk into the wood and won't scratch you floors!!


Next, attach the wood pieces to the bottom of the shoe platform.  You should probably mark where to drill the other holes for the rope first, so the holes are not were the ropes are going to be.  
I didn't, but I lucked out!


You are going to want to cut a piece of rope about 8 inches long.  Tie one end in a knot and feed it through the top hole.  Make sure the knot is under the clog.


Cut a piece of rope about 15 inches long.  Tie a knot on one side and feed through one of the bottom holes. Again, make sure that the knot is underneath.


Make a loop with that rope and loop it around and push through the other hole.  Adjust the length of this rope by using your child's foot and then knot off underneath.


You will then attach the first rope to the second rope and knot it.  Check with the child's foot before knotting the rope.


Use a lighter to melt the nylon at all of the knots so that they will last longer.


He didn't want to paint them red, so I found some John Deere stickers and he went about decorating them that way!


Putting his clogs by the fire!  These have gotten some good use!  He would wear them everywhere if I would let him!  So far I only allow him to wear them out to church and home.

Blessings!!


Hearts for Home Blog Hop
For the Kids Fridays at SunScholars.com
TGIF Linky Party hosted by 123Homeschool4Me